Having an app can make a huge difference for businesses and individuals. However, a common question people ask is, “How long does it take to develop an app?” The answer isn’t simple. The app development timeline depends on factors like the app’s complexity, features, and how it’s built.
Whether you’re planning a simple mobile app or a detailed, feature-packed platform, knowing the app development lifecycle can save time and money.
We’ll also discuss what can slow things down, how to handle these challenges, and ways to speed up development. If you’re wondering, “How hard is it to make an app?” or “How long does it take to get an app on the app store?” This guide has the answers.
Whether you’re working with a professional app development company or want to build an app yourself, understanding these factors will help you navigate the process smoothly.
Let’s discuss!
Factors Influencing the App Development Timeline
The worldwide mobile app market is expected to reach $777.4 billion by 2032. In this massive competition, your app should be developed with all essentials on time.
When creating an app, it’s important to understand what can affect how long it takes to develop it. The app development timeline can vary depending on several factors.

1. Scope and Complexity of the App
Here’s how the complexity affects the timeline:
- Simple Apps: Apps with just a few basic features, such as a calculator or note-taking app, can take about 3 to 6 weeks to build.
- Moderate Apps: Apps that have a few more features, like booking systems or news feeds, might take 2 to 4 months to develop.
- Complex Apps: Apps with many features, like those for banking or online shopping, can take 6 to 12 months or even longer to develop.
2. Platform Selection
The platform you choose for your app also affects how long it will take to develop. Are you building for iOS (Apple) or Android? Or are you building a cross-platform app that works on both? Here’s how the platform affects the timeline:
- iOS App Development: Developing an app for iOS takes longer because it has a strict approval process. Apps for iOS often take 3 to 6 months to complete.
- Android App Development: Android apps tend to have a more flexible approval process and can take 2 to 5 months to develop.
- Cross-Platform App Development: If you want to build an app that works on both iOS and Android, you might use tools like React Native or Flutter. These apps take about 4 to 8 months to build.
If you’re building for just one platform, the timeline will be shorter. But if you want your app to work on both iOS and Android, it may take longer.
3. Budget Constraints
Your budget plays a big role in how long it takes to develop your app. If you have a larger budget, you can hire more developers, speeding up the process. But if your budget is tight, you may have to limit the features or use fewer resources, which can extend the timeline.
With more money, you can hire more people and use better tools to speed up the process. If you don’t have a lot to spend, you may have to cut some features, hire fewer people, or take longer to finish your app.
4. App Development Team
A skilled team can work more quickly and solve problems faster. Here’s how the size and skill of your team can impact the timeline:
- In-House Team: If you already have a team of developers, designers, and testers, your app can be developed faster because they understand your company and your goals.
- Outsourcing: Hiring experts can sometimes costly. If you’re choosing this option, always go for the top app development company near you.
- Solo Developers: If you’re working alone, it will take longer to build your app because you’re handling all parts of the project on your own.
Keep these things in mind to set realistic expectations and ensure the app development process goes smoothly.
How Long Does it Take to Make an App? App Development Lifecycle!
Each app development phase has its own tasks and timeline. Understanding the app development lifecycle helps you know what to expect at each step. Let’s break it down.
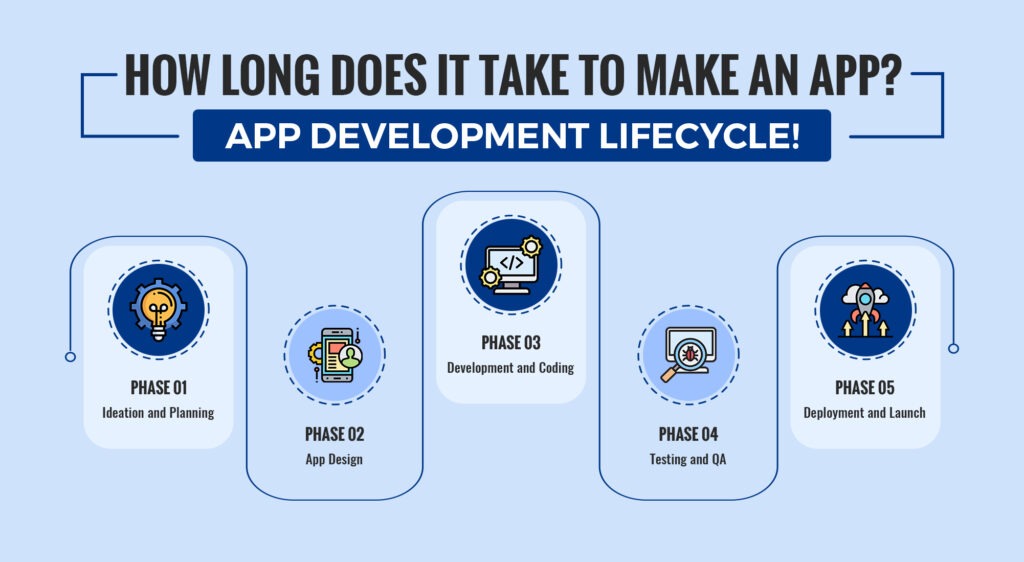
Phase 1: Ideation and Planning (1-3 Weeks)
The first stage of app development is ideation and planning. This is when you decide what your app will do and how it will work. The tasks include:
- What problem does your app solve? Who will use it?
- What apps already exist? What do users want?
- What’s most important for your app? What can wait?
This stage usually takes about 1 to 3 weeks. It’s crucial to get this right because it sets up the rest of the app development.
Phase 2: App Design (2-4 Weeks)
The app design stage focuses on how the app will look and how users will interact with it. It includes two main tasks: UX (user experience) and UI (user interface) design. The goal is to make the app easy to use and attractive. This stage usually takes 2 to 4 weeks.
During this time, app designers will:
- Create wireframes.
- Make prototypes.
Phase 3: App Development and Coding (4-12 Weeks)
Now comes the fun part – actually building the app! This is called app development and coding. It’s when the app’s features are created and put together. A simple mobile app might take about 4 to 6 weeks to develop, while a more complex app could take 10 to 12 weeks.
During this stage, app developers:
- Write code
- Pick the right tools.
- Add extra features.
How long this takes depends on the complexity of your app. For example, a basic app will be quicker to develop than one with many features.
Phase 4: Testing and QA (2-6 Weeks)
After the app is built, it undergoes testing and quality assurance (QA). This stage ensures that everything works properly. It usually takes 2 to 6 weeks.
Key tasks include:
- Identifying and fixing issues in the app.
- Checking if the app can handle many users at once.
- Make sure the app works on different phones and tablets.
Stage 5: Deployment (1-2 Weeks)
The final stage is deployment, where the app is submitted to app stores like Apple’s App Store or Google Play. This stage can take 1 to 2 weeks, but depending on the review process, it can sometimes take longer.
During deployment, app developers:
- Prepare the app for submission.
- Submit to the app store.
Sometimes there are delays during this stage if there are issues with the app or if it doesn’t meet the store’s guidelines.
Wondering How Much Your App Will Cost?
Get a Precise Estimate in Minutes.
Use Our Free Cost CalculatorCase Studies: Timelines for Different Types of Apps
To better understand how long it takes to develop an app, let’s look at real-world examples of apps with varying complexity levels. These cases show how the features and functionality of an app directly affect its development time.
Simple Mobile App (3-6 Weeks)
A basic to-do list app like Todoist has simple features like:
- Basic task creation and deletion
- Reminders or notifications
- Simple user interface (UI) and design
- No backend server (everything is stored locally on the device)
App Development Timeline Breakdown:
- Planning and design: 1 week
- Development: 2-4 weeks
- Testing and launch: 1 week
Takeaway!
Simple mobile apps can be developed quickly and are perfect for testing ideas or launching an MVP (Minimum Viable Product).
Medium-Complexity App (3-6 Months)
An e-commerce app like Amazon involves more features, such as:
- User authentication (sign-up, login)
- Product catalog and shopping cart
- Secure payment integration
- User dashboards and order tracking
App Development Timeline Breakdown:
- Planning and design: 2-3 weeks
- Development: 8-12 weeks
- Testing and QA: 3-4 weeks
Important Fact!
Medium-complexity apps make up most of the apps available in the app stores because they balance user experience and development time.
High-Complexity App (6-12+ Months)
A healthcare app like MyChart provides AI-powered diagnostics and integrates with real-time medical data. It includes various features such as:
- Machine learning for diagnosis and health insights
- HIPAA compliance (for healthcare data privacy)
- Advanced security protocols
- Multi-platform support (iOS, Android, web)
- Real-time data tracking and analytics
App Development Timeline Breakdown:
- Planning and design: 4-6 weeks
- Development: 16-36 weeks
- Testing and iterations: 4-8 weeks
Challenge!
High-complexity apps require in-depth planning, expert app developers, and a rigorous testing process to meet high expectations.
What Influences Timelines in These Cases?
Several factors can extend the app development timeline for each type of app.
Advanced features like GPS tracking or AI can increase development time. In addition, apps that need to connect to third-party services (like social media or payment gateways) require extra time for integration.
Various industries like healthcare and finance have specific rules (e.g., HIPAA compliance), which also add complexity and time to the project.
How to Overcome Challenges That Can Delay App Development
App development is an exciting process, but some challenges can slow things down. Here are the most common problems that can affect your app development timeline:
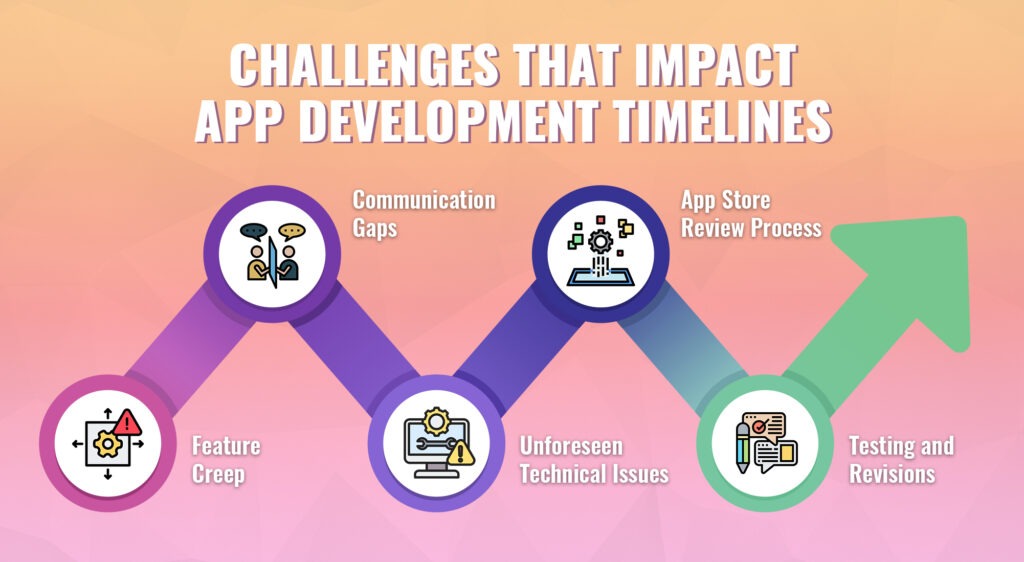
1. Feature Creep
Feature creep happens when extra features are added to the app during development. This makes the app more complicated and can delay the project.
Solution: Focus on creating a Minimum Viable Product (MVP) with only the essential features. You can add new features after the app is launched.
Example: If a fitness app keeps adding new features, like social sharing, it can delay the launch. Stick to the basics first and add extra features later.
2. Communication Gaps
Poor communication between team members can lead to misunderstandings and mistakes, causing delays in the app development process.
Solution: Make sure everyone involved in the project is on the same page. Hold regular meetings and use tools to track progress and share feedback.
Example: If the design team and developers don’t communicate well, certain features might not be built correctly, leading to extra work and delays.
3. Unforeseen Technical Issues
Unexpected technical problems, like bugs or issues with integrations, can stop progress and delay the app.
Solution: Test early and often to spot potential issues before they become big problems. This helps keep things moving smoothly.
Example: If a payment system doesn’t work as planned, developers will need extra time to fix it, delaying the app’s release.
4. App Store Review Process
Getting your app approved by the app store can take time. If your app doesn’t meet the guidelines, it might be rejected, causing delays.
Solution: Understand the app store rules and guidelines before you submit your app. This will help ensure your app gets approved faster.
Example: If an app doesn’t follow app store guidelines, it might be rejected, delaying its release. Double-check everything before submitting.
5. Testing and Revisions
If bugs or issues are missed during early development, they can cause delays during testing and revisions.
Solution: Test throughout the development process and allow time for fixes. Using automated testing tools can speed up this stage.
Example: A game might have performance problems on certain devices. Testing regularly and fixing issues as they come up helps prevent delays later.
Over the first ninety days, a mobile application loses 95% of daily active users. So, you must carefully plan and focus on all stages of your app launch campaign, from app creation to deployment and promotion of the app.
By identifying these challenges and addressing them early, you can keep your app development timeline on track and launch your app on time.
Key Takeaways!
To build an app with all essentials requires careful planning and timely action. Understanding the app development timeline helps ensure your app reaches the market efficiently.
Delays can happen due to unclear requirements, new feature additions, or technical issues. But by addressing these challenges early with clear solutions, like focusing on a Minimum Viable Product (MVP) and working closely with your team, you can keep things on track.
With proper planning and collaboration, you can bring your app to life on time.
Need Further Assistance? Contact Us!
FAQs – How Long Does It Take To Build An App?
How Long Does It Take to Develop an App?
The time it takes to develop an app varies depending on its complexity. Simple apps may take 2-3 months, while more complex apps can take 6-12 months. Factors like features, team size, and testing all influence the timeline.
How to Design an App?
Designing an app involves research, wireframing, prototyping, and UI/UX design. Start by understanding your target audience, then create wireframes to plan the layout. After that, design a user-friendly interface and experience.
Would You Like to Develop an App?
If you’re thinking about developing an app, it’s a great way to engage users and grow your business. Define your app’s purpose, audience, and features. Then, hire experienced app developers like AppVerticals.
How Hard Is It to Make an App?
Making an app can be challenging without technical experience, as it involves coding, design, and testing. However, with the right tools or a professional team, the process becomes more manageable. Contact AppVerticals for your app projects.
How Long Does It Take to Get an App on the App Store?
Getting an app on the App Store typically takes 1-2 weeks, depending on the review process. If your app meets Apple’s guidelines, approval is quicker. However, issues or resubmissions may extend the timeline.
How Long Does It Take to Code an App?
The time it takes to code an app depends on its complexity. Simple apps may take 1-2 months, while more feature-rich apps can take 4-6 months or longer. The coding process involves writing code, testing features, and ensuring compatibility across devices and platforms.

